
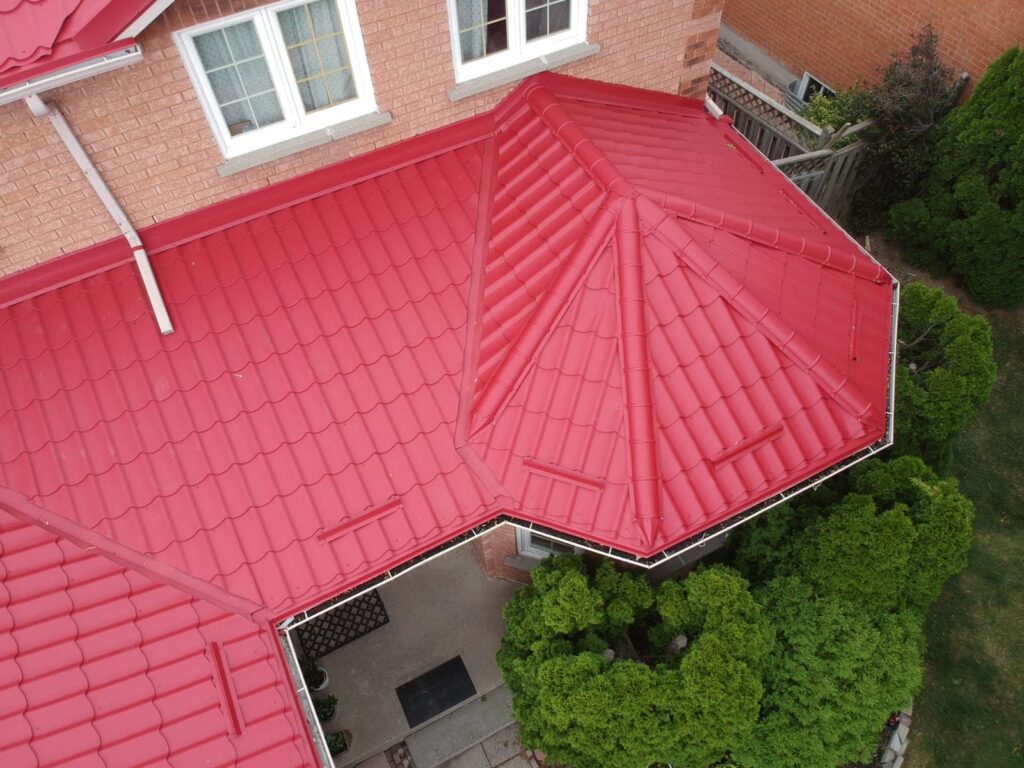
If you’re looking to replace or install a new roof, you can’t go wrong with metal roofing. It’s the top choice for durability, energy-efficiency, and curb appeal. The only question that remains is how to install your metal roof. Fortunately, this guide outlines the entire metal roof installation process, from initial planning to the final roof ridge. Read on to discover everything you need to know to install metal roofs.
Tools Required
- Gloves, goggles, steel-toed boots, & safety harness
- Ladder
- Tape measure & square
- Hammer & pry bar
- Aviation snips or shears
- Hand seamer
- Cordless drill & drill bits
- Chalk line
- Caulking gun
- Level
Materials Required
- Metal roofing panels
- Roofing nails
- Ice and water shield
- Ridge caps
- Eave & valley flashing
- Gable trim
- Self-tapping roofing screws, & washers
- Butyl tape
- Roofing sealant
- Roofing vent boots
- Inside & outside foam closure strips
Step-by-Step Guide to Install Metal Roof
01
Step 1 – Prepare the Roof for Metal Roofing
Clear the way for your metal roofing by removing the old roofing materials and preparing the roof deck. Next, unroll the underlayment while removing the bottom part of the adhesive backing, and overlap the previous layer by about six to eight inches. An ice-and-water shield is a great underlayment option for a metal roof as it provides optimal protection. Keeping the underlayment wrinkle-free is vital but can be difficult. Once completely rolled out, cut the underlayment and pull out the rest of the adhesive.
Pro Tip: Check that the roof deck is completely dry before applying underlayment. Any trapped moisture can lead to rot or mold under your new roof.
02
Step 2 – Install Flashing and Prepare Roofing Materials
Install the eave and valley flashing along the edge of your roof where the slopes meet to help direct water. Organize your roofing materials nearby for easy access and apply a cover when not in use to shield them from the weather. Before you cut and install your metal roof panels, double-check your measurements for guaranteed accuracy. Keep ridge caps and roof ridge materials organized and covered until they’re ready for installation
Pro Tip: Cut flashing with aviation snips instead of power tools to avoid heat buildup that can damage protective coatings.
03
Step 3 – Lay Out the First Row of Steel Roofing Panels
Position the first metal panel square with the eave. Then, use a chalk line to align the subsequent panels. Lightly fasten the panels until you confirm the roofing is square, then secure them firmly. When installing the first row of metal panels, precision is critical. Straight alignment makes the installation process a lot smoother as you progress upwards to the roof ridge.
Pro Tip: Measure diagonally from corner to corner of the panel layout. If both diagonals are equal, your row is square—this prevents misalignment later.
04
Step 4 – Attaching Panels for Installing a Metal Roof
When you’re installing a metal roof, begin placing your panels from the bottom of the eaves and work your way up. Align each panel to overlap the edge of the bottom metal panel by ½ to ¾ inches. You should install panels squarely with the previous metal roof panel using a chalk line.
Pro Tip: Overlap panels by at least one ridge for watertight seams, and always fasten screws in the flat section of the panel, never on the raised ribs.
05
Step 5 – Work Up the Roof
As you install each panel, be careful not to over-tighten the screws and always follow a chalk line to maintain alignment. Place fasteners carefully to guarantee there are no gaps or cracked panels. As you move upwards, check each section for tightness and uniformity as you approach the roof ridge.
Pro Tip: Do not overtighten screws. They should be snug, with the washer slightly compressed, but not squeezed flat—this ensures panels can expand and contract naturally.
06
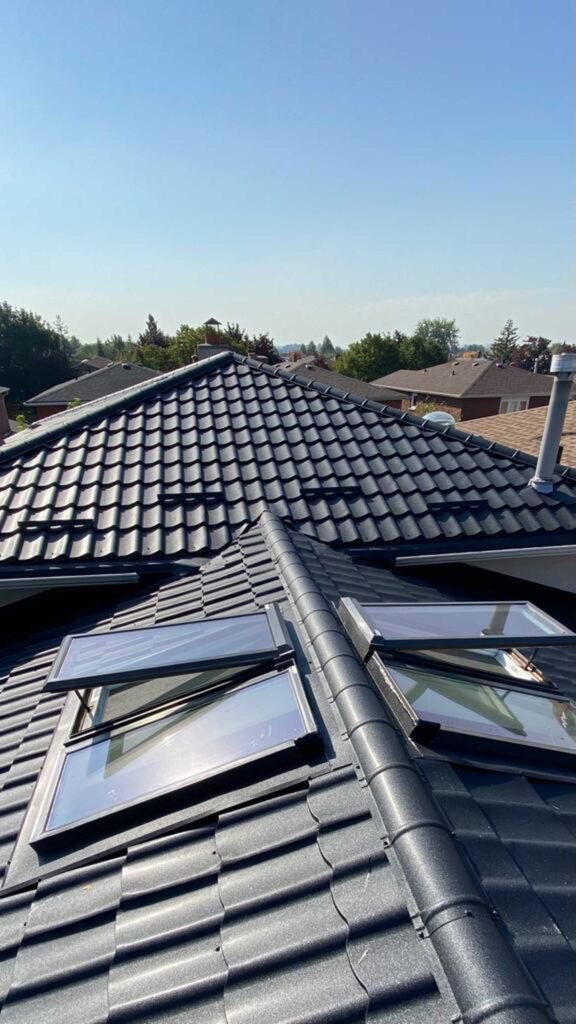
Step 6 – Completing the Roof Ridge on a Metal Roof
Place closure strips along the roof peaks, then install the ridge caps with screws and a sealant tape. This strengthens the entire roofing structure, sealing the roof ridge and prevents leaks. The roof ridge is the finishing step in securing your metal roof. When performed correctly, these steps will safeguard your metal roofing from leaks and moisture intrusion.
Pro Tip: Install foam closure strips before ridge caps to block insects, debris, and wind-driven rain from entering beneath the ridge.
07
Step 7 – Final Inspection of Your Metal Roofing Installation
A final inspection will check that your metal roofing is secure and built to withstand rain, wind, falling debris, and UV rays for decades. Check that all your screws are tight, remove any remaining materials or debris, and apply touch-up paint where needed.
Pro Tip: Walk the roof carefully with a magnet roller to collect any stray metal shavings or screws—leftover metal can rust and stain panels over time.
08
Step 8 – (Optional) Contact Lifetime Metal Roof for Support
Even with a detailed guide, installing a metal roof can feel overwhelming—especially if your roof is large or complex. That’s where we come in. If you’d like expert help with installation, advice on materials, or a professional inspection after your DIY project, reach out to the team at Lifetime Metal Roof. We’re here to make sure your roof is built to last.
Planning Your Installation of a Metal Roofing System
Here’s a simple breakdown of what’s involved in the planning stages when you install metal roofs:
That price reflects not just materials, but labour, preparation, and complexity. And while the metal roof installation cost is typically higher than asphalt, its lifespan often offsets that initial spend. In cities like Toronto or Ottawa, urban demand can push prices slightly higher, while smaller towns might benefit from lower labour costs.
Tools and Roofing Materials Checklist
One of the key steps during the preparation stage of your roof installation is to make a tools and materials checklist. Additionally, this list should include the appropriate safety gear, which is goggles, steel-toed shoes, leather or synthetic gloves, and a full body harness.
Selecting high-quality tools and roofing materials will also make your project much more efficient. This can include sharp snips and shears, thick gauges, and high-grade protective finishes. Professional-grade and properly sized tools and materials can extend the lifespan of your roof and improve its overall durability.
DIY vs. Hiring a Pro for Metal Roofing Installation
DIY metal roofing installations will save you in labour expenses, but materials can cost $5,000 to $8,000+ depending on your roof’s size and the type of metal roofing. In contrast, professional installations can cost $8,000 to $12,000+. Additional considerations include your skill set and potential safety risks. Consult a professional roofer if you have safety concerns or are planning to install a metal roof with a complex installation process.

Conclusion
Choose the best for your home with a DIY or professionally installed metal roof. The above information is a great tool, providing all the information you need for a smooth installation from the first metal panel to applying the roof ridge finishing touch for style and protection. For roofing supply or installation assistance, contact the pros at LIFETIME Metal Roof today!
Got a roof in mind? Let’s get you a proper metal roof quote and map out what’s next for your home.
